DeVeDe / DevedeNG

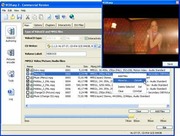
DeVeDe / DevedeNG encodes and authors VCD, sVCD, CVD, and DVD from ordinary media files. Current DevedeNG (Linux) is maintained by Rastersoft; Windows users still use classic 3.17 from VideoHelp. It is the closest thing to a single free GUI that names CVD explicitly.

Guide: Video CD

  1. Start DeVeDe → select Video CD.
  2. Add source videos. Set NTSC or PAL to match your TV region.
  3. Adjust each file: trim length if over a 74/80-minute CD, select audio language, soft subs if offered.
  4. Proceed; DeVeDe encodes MPEG-1 at 352×240/288 and builds a VCD structure / ISO via VCDImager.
  5. Burn with the preferred burner (Brasero/K3B/etc.) or ImgBurn on Windows from a bin/cue/ISO.
  6. Test on a DVD player with VCD support. Cheap media causes more failures than the software.

Guide: Super Video CD (sVCD)

  1. Select sVCD. Add sources; keep an eye on size vs 80-minute CD capacity.
  2. DeVeDe targets MPEG-2 ~480-wide. Fix aspect ratio in file properties (4:3 vs letterbox).
  3. Build ISO/structure; burn; test. If a player refuses sVCD, try VCDEasy with the same encode and SVCD compatibility checkboxes.

Guide: China Video Disc (CVD)

  1. Select CVD explicitly – do not pick sVCD and hope.
  2. Add sources. DeVeDe encodes to 352×480 NTSC or 352×576 PAL MPEG-2.
  3. Review duration: CVD uses more bits per minute than VCD; long films may need two CDs or LP-ish settings if exposed.
  4. Create disc / ISO; burn CD-R; test on SVCD/CVD-friendly DVD players.
  5. Fallback: same CVD MPEGs in VCDEasy as SVCD 1.0 with compliance warnings accepted.

Guide: DVD-Video

  1. Select Video DVD. Add files (DevedeNG: flat file list).
  2. Optional menus: titles, fonts, colours, Play all, page separators.
  3. Choose two-pass encode for quality when time allows. AC3 vs MP2 for menus per options.
  4. Output DVD structure or ISO via mkisofs/genisoimage; burn with Brasero/K3B/ImgBurn.
  5. Verify; test in a standalone DVD player.

Platform notes

  • DevedeNG 4.x – Linux packages from Rastersoft; no official Windows.
  • DeVeDe 3.17 MSI – last Windows build; use a VM on Win10/11.

Public outbound link. We do not host this software. No warranty or support from HD DVD Revived.

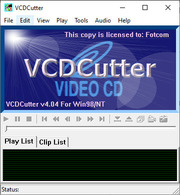
VCD Cutter 4.04

Format reminder: VCD = MPEG-1 352×240/288. SVCD = MPEG-2 ~480×480/576. CVD (China Video Disc) = MPEG-2 352×480 (NTSC) / 352×576 (PAL) – author as SVCD 1.0 with compliance relaxed. Encode first, then author/burn.

VCD Cutter 4.04 (Jiao Shanwu) is a small Windows player/editor for MPEG and Video CD style material: play MPG/DAT/AVI, grab frames, and cut favourite segments to disk before re-authoring.

Guide: play a VCD / SVCD / CVD rip

  1. Insert the disc or open the MPEG/DAT file from a rip (VCD MPEGAV*.DAT, SVCD/CVD MPEG2 folders).
  2. Use the transport controls to scrub. If DAT playback fails, demux/rename to MPG with a rip tool first.
  3. For modern PCs, VLC is usually smoother – keep VCD Cutter for cutting workflows on XP-era boxes.

Guide: cut clips for a new VCD/CVD

  1. Open the source MPG/DAT.
  2. Mark in/out points for each favourite segment; extract to new MPG files.
  3. Optionally grab still frames for menu backgrounds.
  4. Re-encode if the cut stream breaks VCD/SVCD timing (TMPGEnc), then author in VCDEasy / DeVeDe.

Guide: prepare CVD from camcorder / capture rough cuts

  1. Capture or open AVI.
  2. Cut unwanted sections in VCD Cutter when the format allows, or export segments.
  3. Encode the kept parts to CVD MPEG-2 in TMPGEnc (352×480/576).
  4. Author/burn. This “cut then encode” path avoids re-encoding whole tapes.

Members-only Archive link. We do not host this software on our servers. After you log in, the button opens the Internet Archive item page. No warranty, no support, no endorsement. Your risk, your local law.

TMPGEnc Free 2.5 (MPEG encoder)

Format reminder: VCD = MPEG-1 352×240/288. SVCD = MPEG-2 ~480×480/576. CVD (China Video Disc) = MPEG-2 352×480 (NTSC) / 352×576 (PAL) – author as SVCD 1.0 with compliance relaxed. Encode first, then author/burn.

TMPGEnc Free 2.5 (Archive build Free 2.521) is the MPEG-1/2 encoder almost every early-2000s VCD/SVCD/CVD guide assumes. It does not burn discs – encode here, then author in VCDEasy, Nero, DeVeDe, or VCDImager.

Common setup

  1. Install on Windows XP-class systems (or compat mode / VM).
  2. Load AVI / DirectShow sources. Prefer VFAPI or system codecs that match your capture.
  3. Open Setting. On the GOP / Structure tab enable Output bitstream for edit (Closed GOP) when you plan chapters.
  4. Set 4:3 display aspect unless you intentionally letterbox.
  5. Encode to a single multiplexed .mpg (system stream) for VCDEasy.

Guide: encode for VCD

  1. Load the VCD template (or set MPEG-1 Video CD manually).
  2. Size: 352×240 NTSC / 352×288 PAL, 29.97 / 25 fps.
  3. Video bitrate ~1150 kbps; audio MP2 224 kbps 44.1 kHz.
  4. Encode. Author/burn with VCDEasy as VCD 2.0.

Guide: encode for SVCD

  1. Use SVCD template / MPEG-2.
  2. Size: 480×480 NTSC / 480×576 PAL.
  3. Bitrate: stay inside SVCD CD capacity (often ~2000-2500 kbps average with peaks limited).
  4. Audio MP2 224 kbps 44.1 kHz.
  5. Author as SVCD 1.0 in VCDEasy with compliance checks on.

Guide: encode for CVD

  1. Custom size: 352×480 NTSC or 352×576 PAL, MPEG-2, interlaced fields as appropriate for TV.
  2. Example community settings from period forums: ~2496 kbps video, MP2 224 kbps 44.1 kHz, high motion search.
  3. Closed GOP on.
  4. Author in VCDEasy as SVCD 1.0, accept/ignore compliance warnings; or use DeVeDe’s CVD type.

Guide: encode for DVD-Video (elementary)

  1. DVD template: 720×480 / 720×576 MPEG-2, AC3 or MP2 per authoring tool.
  2. Export, then mux/author in DVDStyler, DVD Flick, Nero, or IfoEdit workflows.
  3. TMPGEnc Free is weaker for modern DVD menus than dedicated DVD apps – treat it as the encoder stage only.

Members-only Archive link. We do not host this software on our servers. After you log in, the button opens the Internet Archive item page. No warranty, no support, no endorsement. Your risk, your local law.

GNU VCDImager

Format reminder: VCD = MPEG-1 352×240/288. SVCD = MPEG-2 ~480×480/576. CVD (China Video Disc) = MPEG-2 352×480 (NTSC) / 352×576 (PAL) – author as SVCD 1.0 with compliance relaxed. Encode first, then author/burn.

GNU VCDImager is the open-source mastering toolkit behind most serious VCD/SVCD/CVD pipelines. It builds compliant Video CD and Super Video CD images (bin/cue and related forms), disassembles existing discs, and powers GUIs such as VCDEasy and ffmpegX. On Linux/macOS it is often the direct CLI; on Windows you usually meet it through VCDEasy.

Concepts

  • VCD 2.0 – MPEG-1 in the MPEGAV directory, Playback Control optional.
  • SVCD 1.0 – MPEG-2 in MPEG2 (or compatibility layouts), PBC capable.
  • CVD – encode at 352-wide MPEG-2, author as an SVCD-class image; volume ID / filenames can be adjusted for China-oriented players.

Guide: author a VCD from the command line

  1. Install vcdimager (distro package, Homebrew historic builds, or GNU project binaries from gnu.org/software/vcdimager).
  2. Prepare a multiplexed MPEG-1 VCD stream (352×240/288).
  3. Create an XML description (or use vcdimager simple mode) listing sequence items, optional PBC playlists, and stills.
  4. Run something in the spirit of: vcdimager -t vcd2 -c videocd.cue -b videocd.bin stream.mpg (exact flags depend on version – check vcdimager --help).
  5. Burn the cue/bin with cdrdao, ImgBurn, or Brasero. Prefer Mode 2 / XA burning appropriate for Video CD.
  6. Verify on a hardware player; if PBC fails, rebuild without complex menus first.

Guide: author SVCD

  1. Encode MPEG-2 SVCD resolution (480-wide).
  2. Use type svcd / SVCD 1.0 in the XML or CLI type switch.
  3. Add segment play items, optional scan offsets, and HIGH-type MPEG stills for menus.
  4. Build cue/bin. If a DVD player expects files under MPEGAV instead of MPEG2, adjust the layout options (VCDEasy exposes this as a checkbox; in raw XML you mirror that layout).
  5. Burn and test. Toggle scan-data / APS-related options only when the log complains.

Guide: author CVD

  1. Encode MPEG-2 at 352×480 / 352×576.
  2. Author using the SVCD toolpath. CVD is not a separate imagertype in modern VCDImager docs – the resolution difference is in the elementary stream.
  3. Optionally set volume label / info fields to identify the disc as CVD for picky hardware.
  4. Build and burn like SVCD. Prefer GUI (VCDEasy / DeVeDe / ffmpegX) unless you are automating.

Disassemble / analyze

Use vcd-info and related tools to dump PBC structures from existing discs when reverse-engineering a working CVD/SVCD that your player likes.

Related: VCDEasy, DeVeDe, ffmpegX.

Public outbound link. We do not host this software. No warranty or support from HD DVD Revived.

ffmpegX (Mac)

Format reminder: VCD = MPEG-1 352×240/288. SVCD = MPEG-2 ~480×480/576. CVD (China Video Disc) = MPEG-2 352×480 (NTSC) / 352×576 (PAL) – author as SVCD 1.0 with compliance relaxed. Encode first, then author/burn.

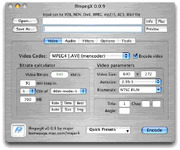
ffmpegX was the classic Mac OS X GUI that chained ffmpeg / mpeg2enc / vcdimager / dvdauthor-era tools. Period docs show explicit paths for VCD, CVD, SVCD, and DVD, then hand images to Toast (Multitrack XA for Video CD family).

Setup

  1. Install the Archive/Tucows package (ffmpegxosx.sit) on a period Mac OS X system (PowerPC or early Intel depending on build).
  2. Ensure the bundled CLI helpers are present; ffmpegX expects them beside the app.
  3. Have Toast (or another XA-capable burner) ready for Video CD / SVCD / CVD images.

Guide: VCD on Mac

  1. Open ffmpegX → select Video CD encode/author mode.
  2. Load QuickTime/AVI/other sources FFmpeg can read.
  3. Target MPEG-1 352×240 (NTSC) or 352×288 (PAL).
  4. Encode, then let ffmpegX/vcdimager produce the image set.
  5. In Toast choose the Multitrack XA / Video CD style burn appropriate to the image.

Guide: CVD

  1. Select the CVD encode/author path (listed alongside VCD/SVCD in period documentation).
  2. Encode MPEG-2 at 352×480 / 352×576.
  3. Author the SVCD-class image with CVD streams.
  4. Burn via Toast Multitrack XA. Test on a CVD/SVCD-friendly DVD player.

Guide: SVCD

  1. Choose SVCD / XSVCD mode.
  2. Encode 480-wide MPEG-2, author image, burn Multitrack XA.
  3. If the player is picky, rebuild with alternate SVCD directory layout (same idea as VCDEasy’s MPEGAV compatibility option) if your ffmpegX build exposes it.

Guide: DVD-Video

  1. Use the DVD encode + dvdauthor-style path.
  2. Produce a VIDEO_TS folder or image.
  3. Burn as DVD-Video in Toast (not Multitrack XA).

Modern Macs: prefer DevedeNG under Linux/VM, or HandBrake + DVDStyler, unless you specifically need the classic OS X toolchain.

Public outbound link. We do not host this software. No warranty or support from HD DVD Revived.

VCDEasy

Format reminder: VCD = MPEG-1 352×240/288. SVCD = MPEG-2 ~480×480/576. CVD (China Video Disc) = MPEG-2 352×480 (NTSC) / 352×576 (PAL) – author as SVCD 1.0 with compliance relaxed. Encode first, then author/burn.

VCDEasy is a Windows GUI around GNU VCDImager (and optionally CDRDAO) for building and burning VCD, SVCD, XVCD/XSVCD, and CVD discs. It does not encode video – feed it already-multiplexed MPEG files from TMPGEnc, DeVeDe, or similar. Best on Windows XP; on Win7+ use a VM if the installer or ASPI layer misbehaves.

Before you start (all formats)

  1. Install VCDEasy (VideoHelp hosts shareware 3.x and freeware 1.1.5.2; Archive has older Tucows builds).
  2. Open Settings and configure CDRDAO if you will burn from VCDEasy. Restart the app after enabling CDRDAO integration.
  3. Always enable Analyse MPEG files. Leave Perform some MPEG compliance checks on for strict VCD/SVCD; for CVD / XVCD you will often need to accept warnings or uncheck the check.
  4. Encode your source first (see TMPGEnc Free 2.5). Closed GOPs (“Output bitstream for edit” in TMPGEnc) make chapter points more accurate.

Guide: make a Video CD (VCD)

  1. Encode: MPEG-1, 352×240 NTSC or 352×288 PAL, ~1150 kbps video, MPEG-1 Layer II audio 224 kbps @ 44.1 kHz. Use a VCD 2.0 template.
  2. In VCDEasy set disc type to VCD 2.0 (or VCD 1.1 if you do not need Playback Control). Choose PAL or NTSC to match the encode.
  3. Name the volume, pick a temp output folder with plenty of free space.
  4. Click Add Files and select your .mpg stream(s). If prompted for autopadding, choose Yes when recommended.
  5. Optional chapters: use the chapter tools / ChapterXtractor paste workflow. Set the first entry start to 0:00:00.000.
  6. Optional still menus: Tools → MPEG Stills. Convert a 320×240 (NTSC) or 384×288 (PAL) still with MPEG still type LOW, then attach it under Interactivity / PBC.
  7. Select your burner (or “No CD Writer” to only build a bin/cue). Prefer simulate-then-burn: run with Simulate checked first, eject, then Burn alone.
  8. Press Go. Test the disc in the target DVD/VCD player – some decks hate certain CDR brands; try CDRW if needed.

Guide: make a Super Video CD (SVCD)

  1. Encode: MPEG-2, 480×480 NTSC or 480×576 PAL (or 480×480 with letterbox for 16:9 sourced material per your template), variable or constant bitrate in SVCD range, MP2 audio 224 kbps @ 44.1 kHz. Closed GOP recommended.
  2. Disc type: SVCD 1.0. PAL/NTSC match the encode. Enable Interactivity if you want PBC menus.
  3. Add the MPEG-2 file(s). Keep compliance checks on; fix the encode if VCDEasy rejects the stream.
  4. Player quirks (Settings → (S)VCD Player): some DVD players need “Use MPEGAV/ENTRYSVCD instead of MPEG2/ENTRYVCD” or “Update scan data offsets”. Test both states of Update scan data offsets on your deck.
  5. Menus: MPEG Stills with type HIGH; still size typically 640×480 NTSC / 768×576 PAL.
  6. Go → build/burn. If CDRDAO does not see your drive, build bin/cue and burn with ImgBurn / FireBurner / CDRWIN.

Guide: make a China Video Disc (CVD)

  1. Encode: MPEG-2 at 352×480 NTSC or 352×576 PAL (half-D1). Typical period settings: ~2000-2500 kbps video, MP2 224 kbps @ 44.1 kHz, interlaced, 4:3. Closed GOP helps chapters.
  2. In VCDEasy choose disc type SVCD 1.0 (there is no separate “CVD” radio button in most builds). PAL/NTSC to match.
  3. Add the CVD MPEG. Compliance check will usually complain – accept the file anyway, or uncheck “Perform some MPEG compliance checks” (VideoHelp consensus for CVD).
  4. Do not enable “Update scan data offsets” if that option is forcing 352-wide streams to behave like 480-wide SVCD on your player; try both if the disc fails.
  5. Menus: same as SVCD – MPEG still type HIGH.
  6. Burn and test on DVD players that claim SVCD/CVD support. Many SVCD-capable decks play CVD; CVD-only hardware is rare today.

Troubleshooting

  • Burner missing: update ASPI / Force driver in CDRDAO settings, or export image and burn elsewhere.
  • Player ignores SVCD/CVD: flip the three SVCD player compatibility checkboxes; try the “VCD header trick” threads on VideoHelp for stubborn decks.
  • Chapters skip badly: re-encode with closed GOPs and rebuild.

Related: TMPGEnc Free 2.5, GNU VCDImager, DeVeDe, ImgBurn.

Public outbound link. We do not host this software. No warranty or support from HD DVD Revived.

Extended tips: menus, chapters, and player quirks

Menus are where most first-time CVD/SVCD burns fail. For SVCD/CVD, convert stills with MPEG still type HIGH; for VCD use LOW. NTSC menu stills are typically 640×480 (SVCD/CVD) or 320×240 (VCD); PAL uses 768×576 or 384×288. Generate the still MPEG inside VCDEasy (Tools → MPEG Stills), then wire it under Interactivity / PBC so the remote’s Root/Menu keys return somewhere useful.

Chapters: closed-GOP encodes from TMPGEnc make entry points land on I-frames. When pasting ChapterXtractor data, force the first disc’s start offset to zero and set the end offset to that disc’s play length before pushing chapters across. Enable numeric keys for chapter select when your player supports it. If the log complains about APS, try “relax APS constraints” only after a clean encode still fails.

Burning: CDRDAO simulate-then-burn avoids half-written coasters when packet-writing software (DirectCD, etc.) is fighting the drive. No burner in the list? Install/update ASPI, try Force driver, or set No CD Writer, build bin/cue, and burn with ImgBurn. Some DVD decks hate certain CD-R dyes – keep a spindle of a second brand and a CD-RW for tests.

SVCD player checkboxes (Settings → (S)VCD Player): work through them methodically. “Update scan data offsets” helps some decks and breaks CVD on others because it can make 352-wide streams behave like 480-wide SVCD. “Use MPEGAV/ENTRYSVCD…” relocates files for players that look in the VCD directory layout. Change one option per test burn.

XVCD/XSVCD (non-standard bitrates/sizes) always trip compliance – accept warnings the same way you do for CVD. Document which checkbox set works on your living-room player; that note is worth more than any generic forum post.


Nero 8 Ultra Edition HD

Nero 8 Ultra Edition HD is a period all-in-one suite: Nero Burning ROM, Vision (DVD / early HD), Recode, ShowTime, and historic HD DVD / Blu-ray authoring components. Treat it as a Windows XP/Vista-era VM guest.

Guide: DVD-Video with Nero Vision

  1. Open Nero Vision → Create DVD → DVD-Video.
  2. Add video clips; trim; set chapters.
  3. Edit menu templates; preview.
  4. Burn or make image. Prefer Verify.

Guide: VCD / SVCD burn

  1. In Burning ROM or Vision, choose Video CD or Super Video CD project.
  2. Add already-encoded MPEG. For strict SVCD leave compliance on.

Guide: China Video Disc (CVD)

  1. Encode CVD MPEG-2 (352×480/576) in TMPGEnc first.
  2. Create a Super Video CD project.
  3. Turn off “Make standard compliant SVCD” (or equivalent wording).
  4. Add the CVD stream, burn CD-R, test on SVCD/CVD-capable players.
  5. If Nero rejects the file, use VCDEasy instead.

Guide: HD DVD authoring / burning (period)

  1. Use the HD DVD project types included with Ultra HD builds where present.
  2. Follow Nero’s HD DVD wizard for menus and H.264/VC-1 assets per the version’s limits.
  3. Hardware HD DVD burner + media required for physical discs; most users today only need ShowTime/Vision for playing pressed HD DVDs.
  4. Professional interactive HD DVD still belongs in Scenarist.

Guide: AVCHD

Nero Vision 5 (in Nero 8) was an early consumer AVCHD path: create AVCHD project, add HD clips, SmartEncoding, burn to DVD media as BDMV. Prefer multiAVCHD or TMPGEnc Authoring Works 4 for more control.

Not CBHD

Nero does not author China Blue High-definition discs. See the CBHD support article.

Members-only Archive link. We do not host this software on our servers. After you log in, the button opens the Internet Archive item. No warranty, no support, no endorsement. Your risk, your local law.

Extended tips: project choices and era hardware

Nero 8 is a suite: Burning ROM for raw project types, Vision for guided movie discs, Recode for bitrate fitting, ShowTime for playback. For CVD, Vision/Burning ROM Super Video CD projects with compliance disabled is the period method; if the UI still rejects half-D1 MPEG-2, stop fighting Nero and finish in VCDEasy. For DVD-Video, Vision menus are adequate for home videos; escape to DVDStyler or Architect when you need layered menus and playlists.

HD DVD features in Ultra HD builds assume mid-2000s drivers and often physical HD DVD burners that barely exist retail today. Treat HD DVD authoring here as archival experimentation: keep projects small, verify on a software player first, and do not expect modern Windows 11 to install cleanly without a VM. Interactive studio titles still need Scenarist Advanced Content with a dongle.

AVCHD in Vision 5: create an AVCHD project, add HD clips, let SmartEncoding fit DVD media, burn BDMV. Always confirm UDF 2.50 if you burn outside Nero. Compare results with multiAVCHD on the same clips – multiAVCHD often muxes cleaner for picky Blu-ray decks.

ShowTime / Vision playback of commercial HD DVDs is the realistic daily use on a machine that still has an HD DVD drive. Keep firmware and AACS client components of that era aligned; this site’s decrypt section is separate and outbound-only for a reason.

VLC media player 2.2.2 for Windows

VLC 2.2.2 is a practical software player for almost every format discussed on Free Downloads. It will not author discs, but it is the fastest way to check encodes and rip folders before you burn.

Guide: play VCD / SVCD / CVD

  1. Insert the CD or open MPEGAV*.DAT / MPEG2*.MPG from a rip.
  2. Media → Open Disc / Open File. If DAT fails, copy and rename to .mpg.
  3. Use Playback → Speed and deinterlace toggles for interlaced CVD/SVCD on progressive monitors.

Guide: play DVD-Video

  1. Open Disc → DVD. Navigate menus with the DVD menu hotkeys / on-screen controller.
  2. For VIDEO_TS folders on hard disk: open the folder or VIDEO_TS.IFO.

Guide: play AVCHD / BDMV

  1. Open the BDMV folder or index.bdmv from an AVCHD disc image.
  2. If menus fail, open the longest M2TS under STREAM directly to check video quality.

Guide: play HD DVD (limited)

  1. Commercial HD DVD Advanced Content menus usually need PowerDVD / ArcSoft TMT.
  2. VLC can often play demuxed EVO/MPLS streams for technical checks, not full HDi interactivity.

Guide: play 8KDVD media files

  1. VLC can play the VP9/Opus files inside an 8KDVD folder for quality checks.
  2. For full menus use the 8KDVD Windows Player, Chromium launcher, or Kodi plugin.

China Blue (CBHD)

VLC does not play CBHD discs. See the CBHD support article.

Member download on this site build. No warranty.